May 15, 2020
Pre-Wrap Headband How To
I am by NO means a "beauty blogger" but I do get asked multiple times a day about my head bands. I figured it would just be the easiest solution to write one post to direct everyone to. So here it is. And FYI, I literally only wear eyeliner as makeup, so do not be looking out for any makeup tutorials any time soon. Not going to happen, I'll leave that to the professionals.
The headbands I wear are actually pre-wrap material that I DIY and turn into a headband. The traditional use for pre-wrap is under athletic tape to keep the tape from adhering to skin, however it has dozens of other uses that make it indispensable for athletes. It has been commonly used in recent years as a hair band to keep fly-away hairs out of athletes' eyes. Because it is easy to tear but strong when twisted, it is also used to create knee and elbow straps that alleviate the pressure on painful tendons.
The wrap I get is from Mueller and I order it off of Amazon for only $16.00 for a dozen rolls. A roll can last me a month and is over 30 yards of latex free foam. If you want to give it a try and don't want to commit to a years worth of product, they also have a two roll pack for $5.00 on Amazon. There are so many ways to use and style pre-wrap, this is just the way that works for me, but I would love to see what types of styles you come up with!

Start with hair up or down.
First, start with your hair either up or down. The pre-wrap headband will work either way. If you want to spray your hair with some hair spray at this point, you can, or you can wait until after the headband is on.
Unravel a small strip of pre-wrap.
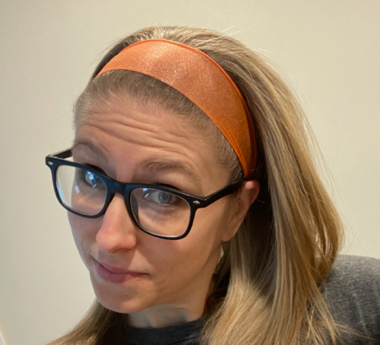
Pick your pre-wrap. I often match my headband to my outfit, whatever, you do you. Unravel a small portion of the pre-wrap to prepare, you do not need very much.
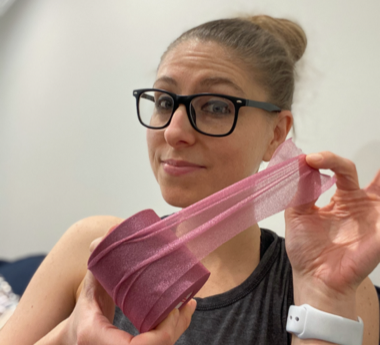
Place the pre-wrap around your neck.
Take the small portion of pre-wrap you unraveled and put it behind your neck, holding the roll in one hand and the end of the wrap in the other.
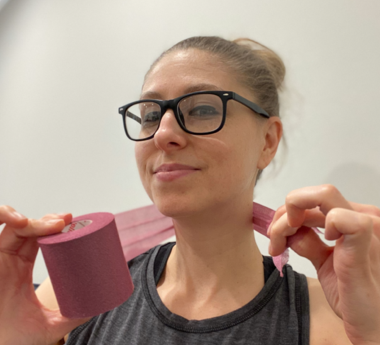
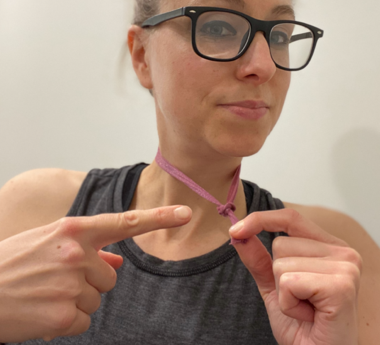
Bring the two sides together.
An inch or two in front of your neck, bring the two sides together to measure the size of the headband.
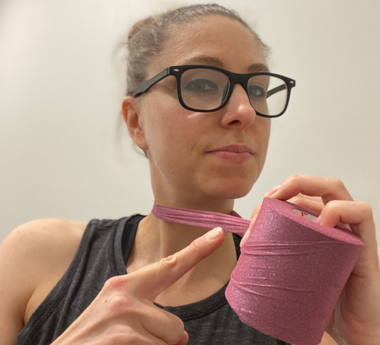
Rip the roll off of the headband.
Use your fingers to rip the roll at the measurement point. Hold both sides together.
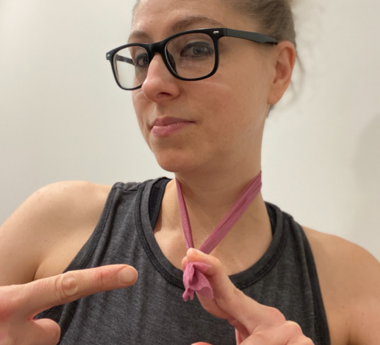
Make a small knot.
Pull the pre-wrap tight and make a knot as close to the end as you can. If there is too much of a "tail" just rip it off so it's short and neat.
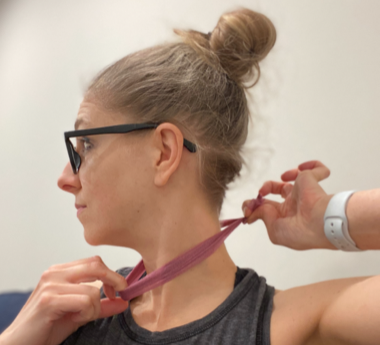
Twist the knot behind your neck.
Rotate the headband so the knot is in the back of your neck and hidden.
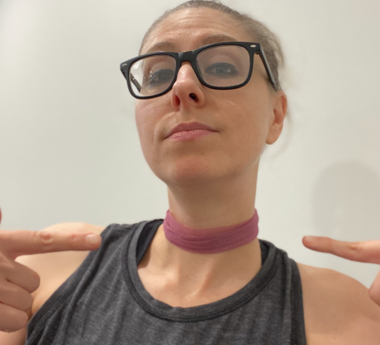
The pre-wrap will lay comfortably against your neck.
With the knot in the back, the headband will not be tight or loose, but lay comfortably against your neck.
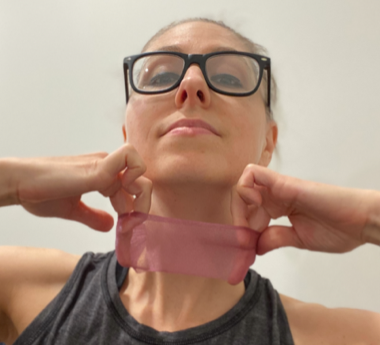
Make the pre-wrap flat.
Using your fingers, unfold the pre-wrap and make it stretch out flat. Slide your hands around the entire headband so it is all open and flat.
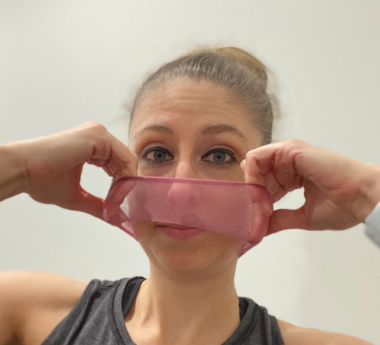
Pull the flat headband over your face.
Keeping the pre-wrap flat and tight, pull the headband over your face. If you wear glasses, like me, you might want to remove them at this point.
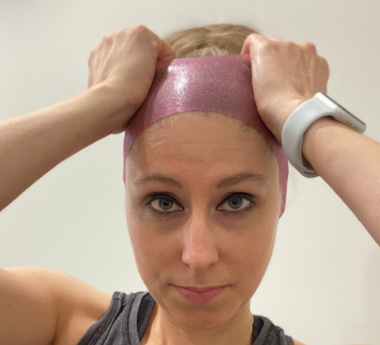
Continue to pull the headband onto your head.
Continuing to keep the pre-wrap flat and tight, pull the headband over your head. Find the position you would like it to sit.
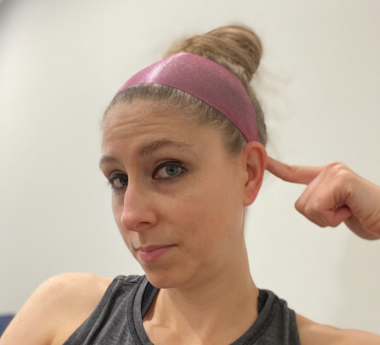
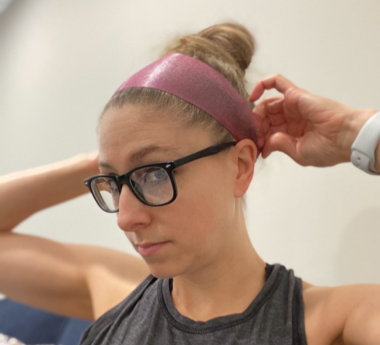
Slide the pre-wrap over and behind your ears.
Gently and carefully, slide the pre-wrap over and behind each ear. Tuck any loose hairs that might escape back under the pre-wrap.
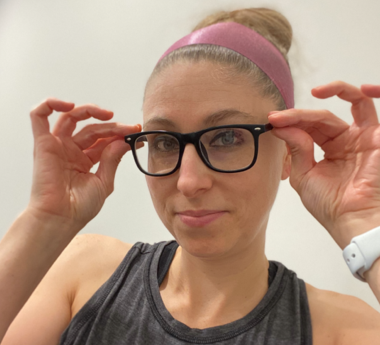
Put your glasses back on.
If you need to, now is the time to put your glasses back on.
Flatten and straighten all around.
Using your fingers, pull and stretch the pre-wrap so that it lays flat on your head all the way around. Tucking any loose hairs as needed.
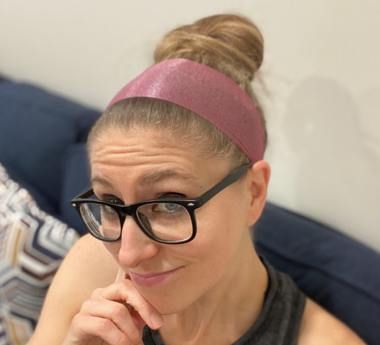
That's it!
And you're done. This technique works if your hair is up or down. Also, you can use some hair spray at this point, as well, if you want a more sleek look. I really just use the headband to hold the fly-aways back. Throughout the day, you might need to pull the headband back down around your neck and start over. Also, if it gets loose, you can just tie a new knot and discard any extra pre-wrap.

Colleen is an ISSA Certified Nutrition Coach, Culinary Institute of America Graduate and Your Gluten-Free Celiac Sidekick.
*Nutrition information can vary for a recipe based on factors such as precision of measurements, brands, ingredient freshness, or the source of nutrition data. We strive to keep the information as accurate as possible, but make no warranties regarding its accuracy. We encourage readers to make their own calculations based on the actual ingredients used in your recipe, using your preferred nutrition calculator. The author(s) of the website are not registered dietitians or medical professionals. Any recommendations are made based on our research or personal experience, but shall not be construed as medical or nutritional advice. You are fully responsible for any actions you take and any consequences that occur as a result of anything you read on this website. Please see Nutritional Disclaimer page for more information.
Contact Me
Best Way To Get In Touch
Easiest way to reach me is to send me an email at colleen@colleensaltarelli.com. You can also message me on social media. Looking forward to chatting with you!
Newsletter
Want To Be The First To Know?
I'll be dropping in with social media tips that you will be actually interested in, because no one likes getting junk mail, am I right?